Deploying The Kubernetes Dashboard With Helm: A Complete Information
Deploying the Kubernetes Dashboard with Helm: A Complete Information
Associated Articles: Deploying the Kubernetes Dashboard with Helm: A Complete Information
Introduction
On this auspicious event, we’re delighted to delve into the intriguing matter associated to Deploying the Kubernetes Dashboard with Helm: A Complete Information. Let’s weave attention-grabbing data and provide recent views to the readers.
Desk of Content material
Deploying the Kubernetes Dashboard with Helm: A Complete Information

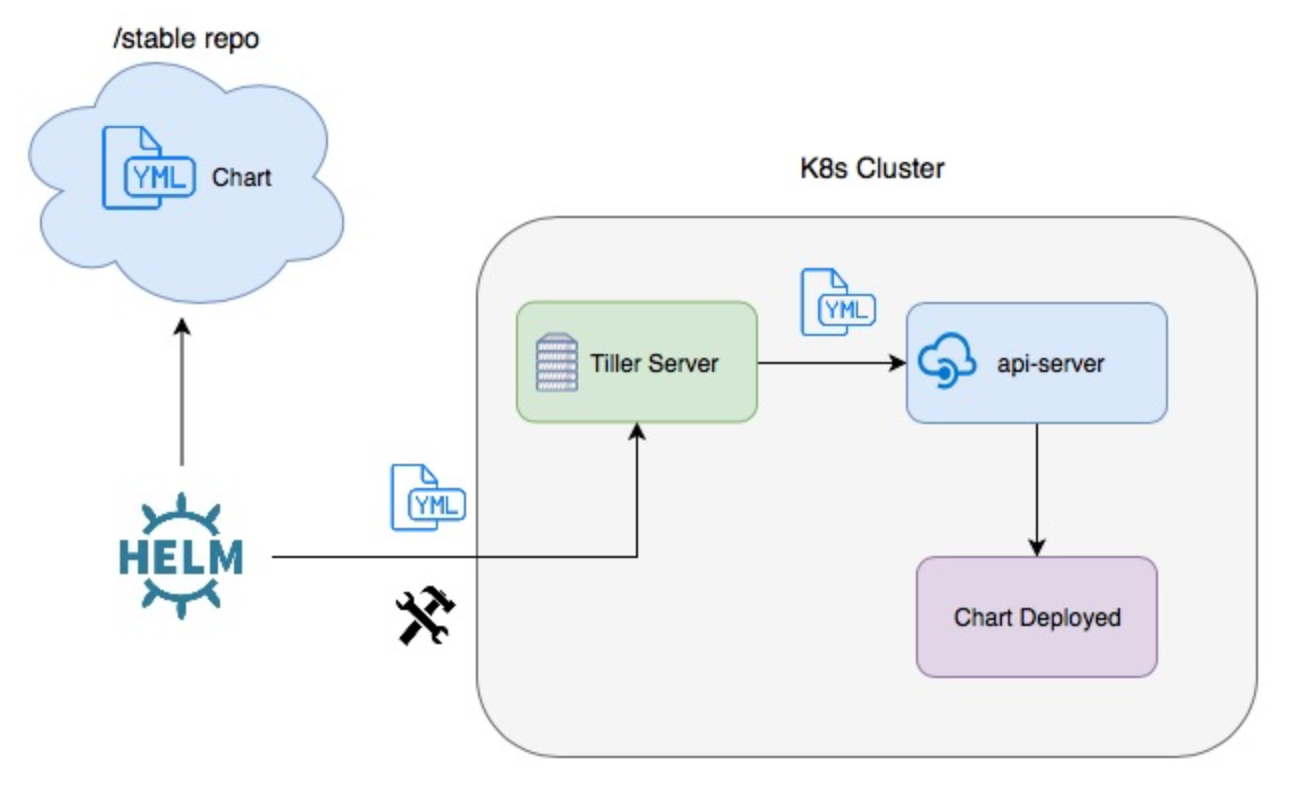
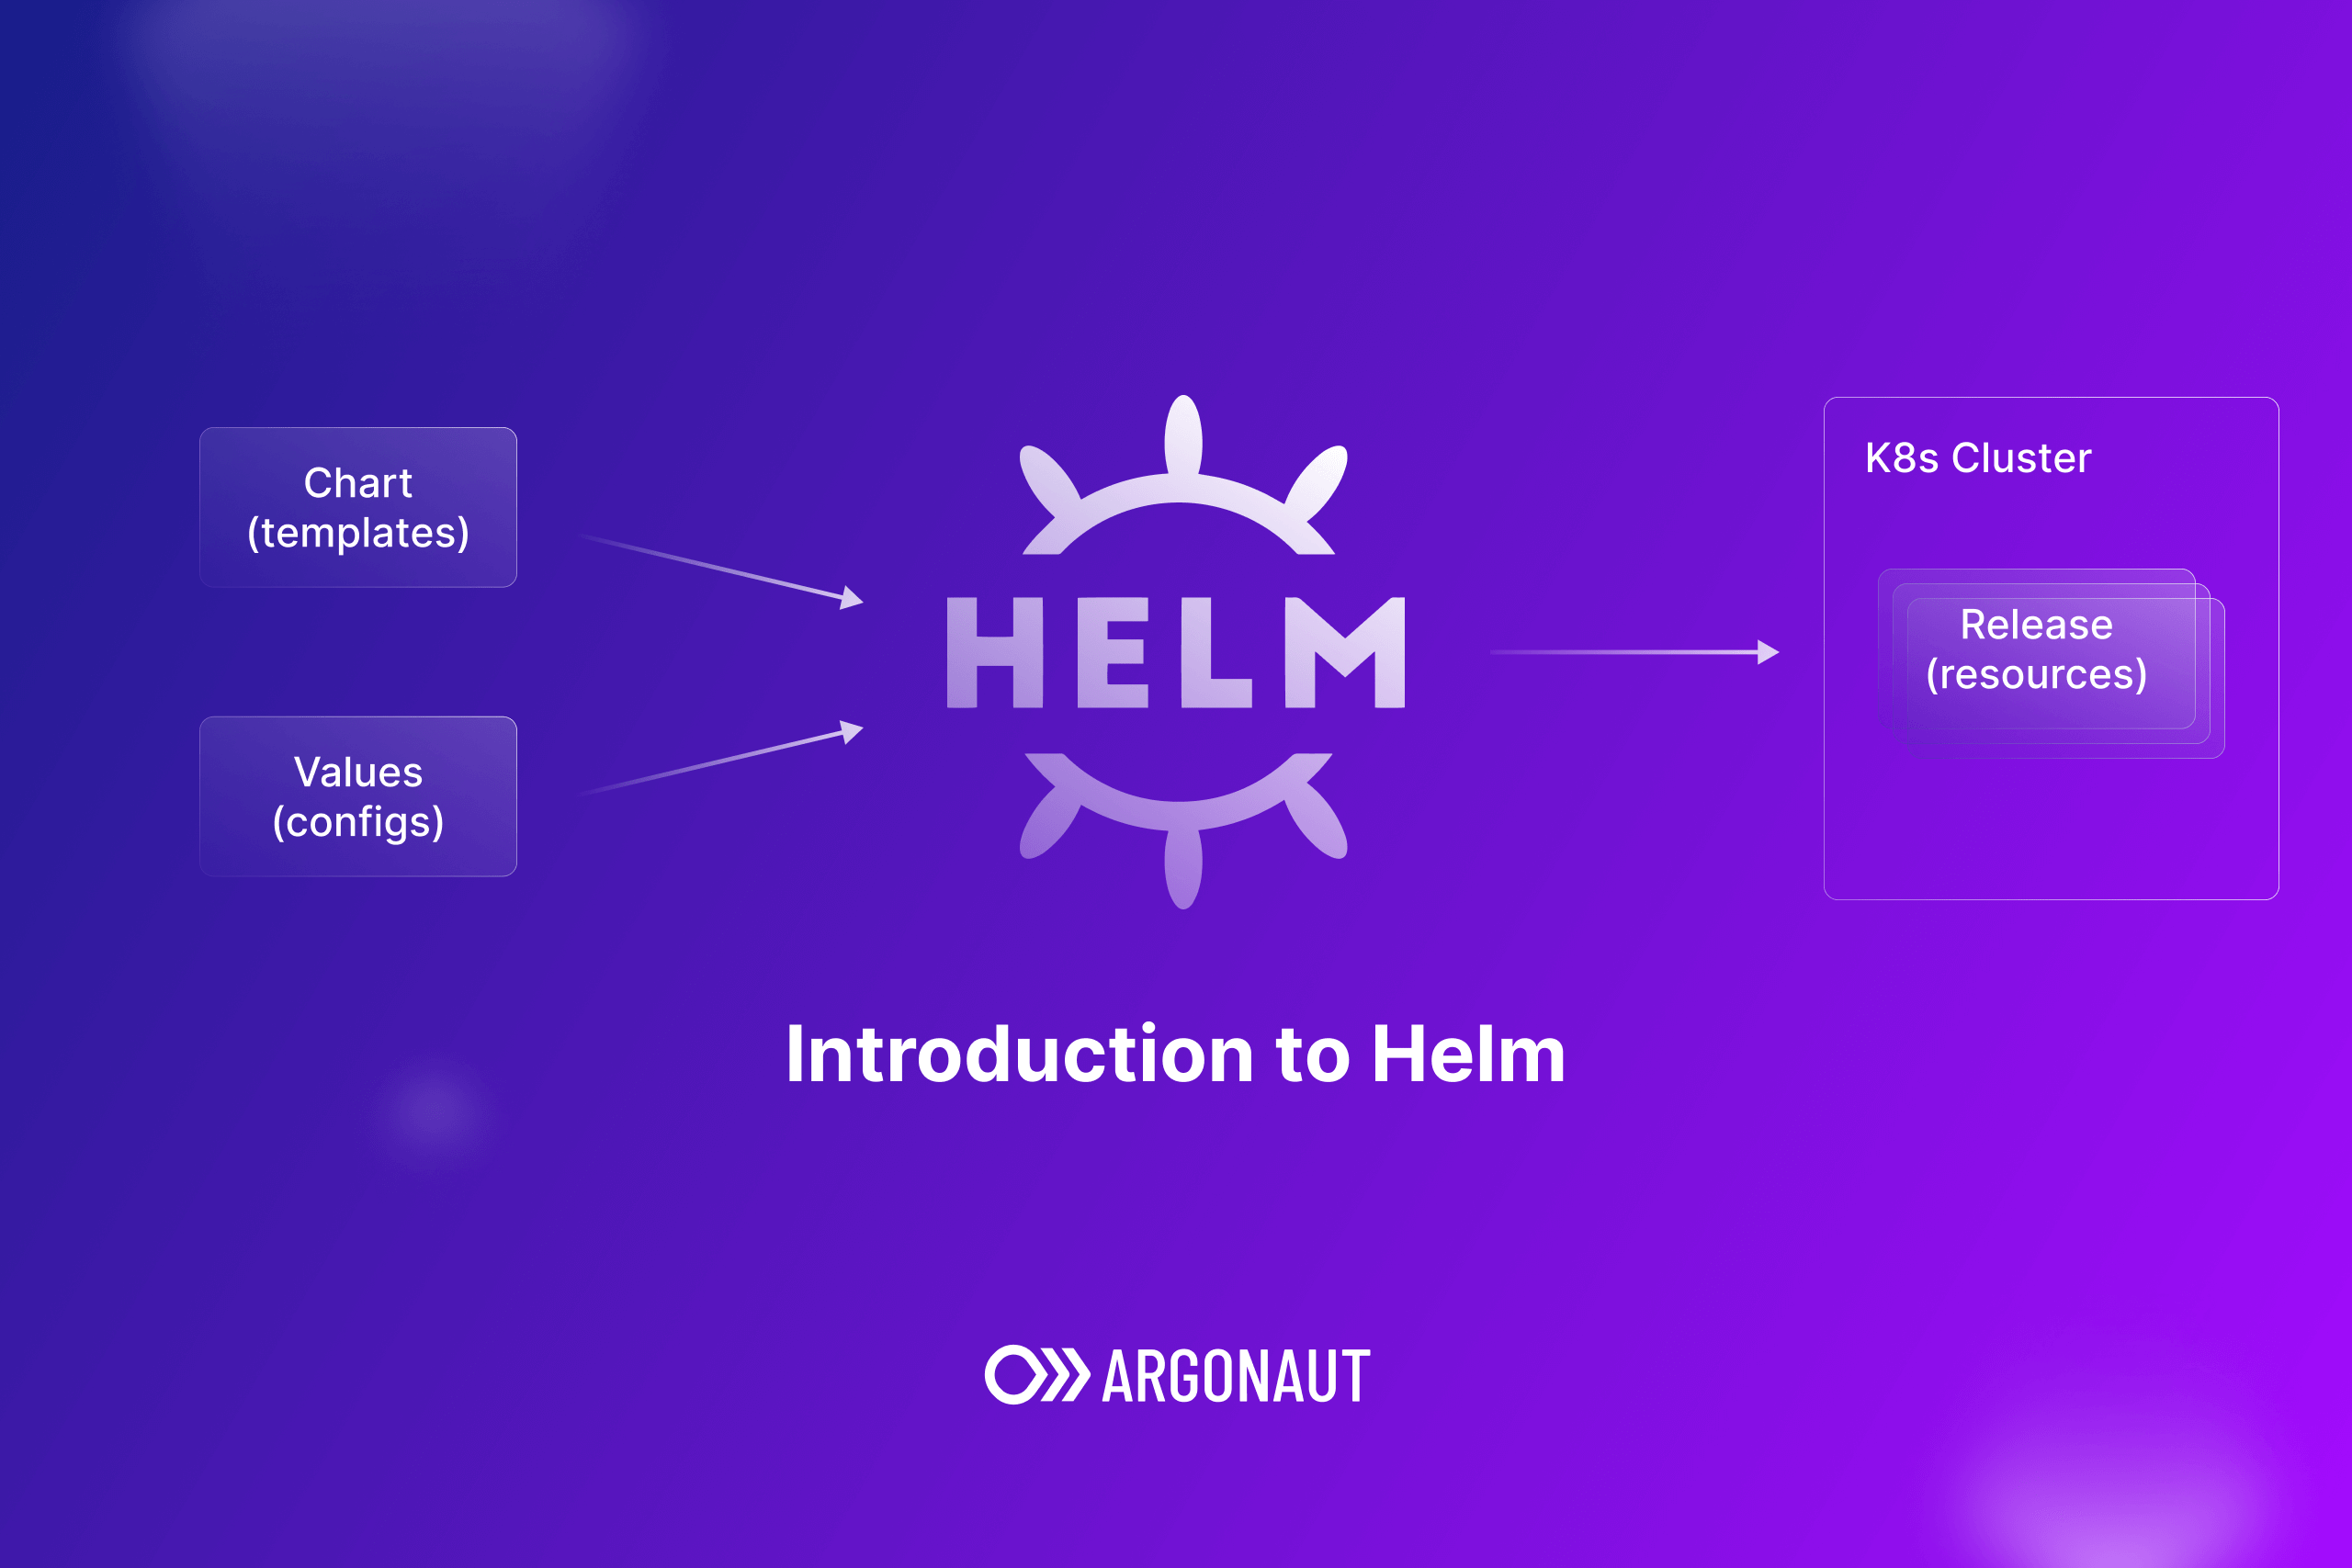
The Kubernetes Dashboard is a user-friendly internet UI for interacting along with your Kubernetes cluster. When you can handle Kubernetes sources utilizing the command line, the Dashboard offers a visible interface, making it simpler for rookies and skilled customers alike to observe, troubleshoot, and handle their functions. Deploying the Dashboard immediately might be cumbersome. That is the place Helm, the Kubernetes bundle supervisor, shines. Utilizing a Helm chart simplifies the deployment course of considerably, automating the creation of vital sources and streamlining upgrades. This text dives deep into deploying the Kubernetes Dashboard utilizing a Helm chart, overlaying numerous facets from set up and configuration to troubleshooting and finest practices.
Understanding the Kubernetes Dashboard and its Performance
The Kubernetes Dashboard offers a central level of management for managing your Kubernetes cluster. Its key options embrace:
- Useful resource Monitoring: View the standing and metrics of your pods, deployments, companies, and different Kubernetes objects. Establish useful resource bottlenecks and potential issues simply.
- Utility Administration: Deploy, replace, and scale functions immediately from the UI. This eliminates the necessity for fixed command-line interactions.
- Occasion Logging: Monitor occasions inside your cluster, serving to in debugging and troubleshooting points.
- Pod and Container Administration: Examine particular person containers inside pods, view logs, and execute instructions.
- Namespace Administration: Handle namespaces and their related sources.
- Secret Administration: Whereas indirectly enhancing secrets and techniques, the Dashboard lets you view and handle their lifecycle.
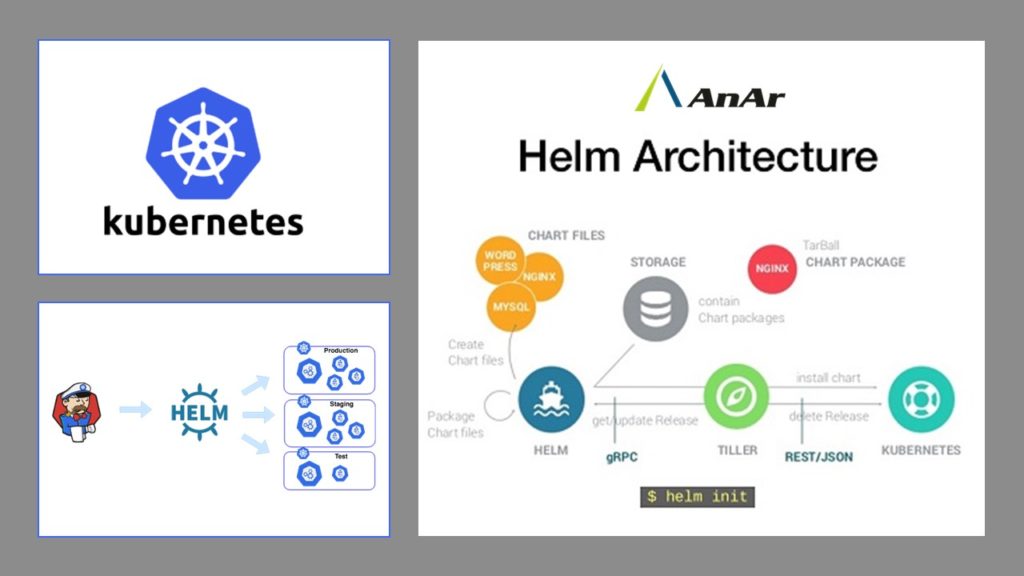
Why Use Helm for Dashboard Deployment?
When you can manually deploy the Kubernetes Dashboard utilizing YAML manifests, utilizing a Helm chart gives a number of benefits:
-
Simplified Deployment: Helm abstracts away the complexity of managing a number of YAML information. A single
helm set upcommand handles your complete deployment course of. - Model Management: Helm charts are versioned, permitting for simple rollback to earlier variations if wanted.
- Configuration Administration: Helm permits for customizing the deployment by values information, enabling tailoring the Dashboard to your particular wants.
- Reusable Elements: The Helm chart might be reused throughout totally different clusters, guaranteeing consistency in deployment.
-
Automated Upgrades: Upgrading the Dashboard turns into a easy
helm improvecommand.
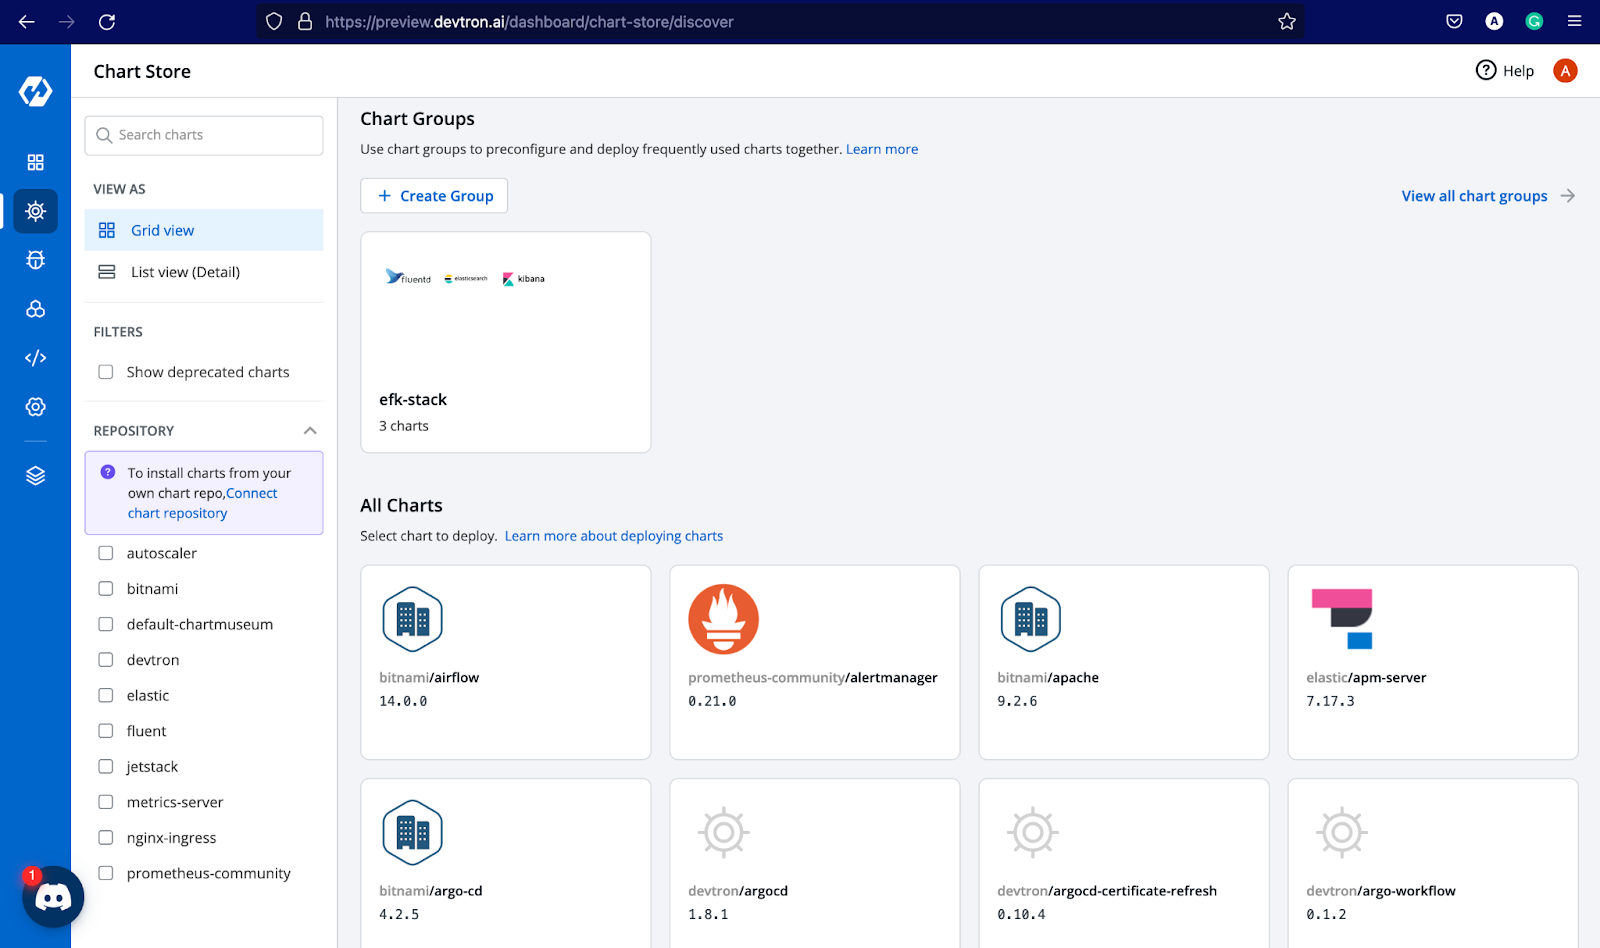
Putting in the Kubernetes Dashboard Helm Chart
Earlier than starting, guarantee you’ve gotten Helm put in and configured accurately. You’ll find directions on the official Helm web site. The commonest Helm chart repository for the Kubernetes Dashboard is the official Kubernetes repository. Nevertheless, community-maintained charts would possibly provide extra options or customizations. We’ll deal with the official repository on this instance.
- Add the Kubernetes Chart Repository:
helm repo add kubernetes-charts https://kubernetes.github.io/ingress-nginx
helm repo replace- Set up the Dashboard:
The essential set up command is:
helm set up my-dashboard kubernetes-charts/kubernetes-dashboardThis command installs the chart with the default configuration. The my-dashboard is the discharge identify – you may select any descriptive identify.
Customizing the Deployment with Values
The default configuration won’t at all times suffice. Helm permits for customizing the deployment by a values.yaml file. This file lets you override default settings, akin to:
-
Service Kind: Change the service sort from
ClusterIP(default) toNodePortorLoadBalancerfor exterior entry. - Useful resource Limits: Modify the CPU and reminiscence limits for the Dashboard deployment.
- Picture: Specify a special picture for the Dashboard, doubtlessly utilizing a customized picture with added safety patches or monitoring instruments.
- Authentication: Configure authentication strategies (e.g., utilizing a service account or OAuth). That is essential for safety.
Instance values.yaml for NodePort entry:
service:
  sort: NodePort
To make use of this tradition configuration, run the set up command with the -f flag:
helm set up my-dashboard kubernetes-charts/kubernetes-dashboard -f values.yamlAccessing the Dashboard
After profitable set up, you want to acquire the Dashboard’s URL. In the event you used the default ClusterIP service sort, you will have to port-forward to entry it domestically:
kubectl port-forward service/kubernetes-dashboard 8000:80This command forwards port 80 from the Dashboard service to port 8000 in your native machine. Entry the Dashboard at http://localhost:8000.
In the event you used NodePort, the URL will probably be accessible from outdoors the cluster at <NodeIP>:<NodePort>, the place <NodeIP> is the IP deal with of considered one of your Kubernetes nodes and <NodePort> is the port assigned by Kubernetes. In the event you used LoadBalancer, the cloud supplier will assign a public IP deal with, which will probably be displayed within the Kubernetes service particulars.
Authentication and Authorization
For manufacturing environments, securing the Dashboard is paramount. The default configuration typically lacks strong authentication. You could configure acceptable authentication strategies, akin to:
- Service Account Tokens: It is a widespread strategy for inner entry. Generate a service account token and use it to authenticate.
- OAuth2 Proxy: Combine with an OAuth2 supplier (like Google, GitHub, or Okta) for safe exterior entry. This requires configuring an OAuth2 proxy in entrance of the Dashboard.
- RBAC (Position-Based mostly Entry Management): Implement RBAC to regulate which customers and teams have entry to particular sources throughout the Dashboard.
Troubleshooting Frequent Points
- Dashboard Not Accessible: Confirm the service sort and port forwarding accurately. Examine the Kubernetes logs for errors.
- Authentication Errors: Guarantee your authentication configuration is accurately arrange and the credentials are legitimate.
- Useful resource Limits: If the Dashboard is unresponsive, improve the useful resource limits (CPU and reminiscence) allotted to the deployment.
- Picture Pull Errors: Guarantee your Kubernetes nodes have entry to the container registry the place the Dashboard picture is hosted.
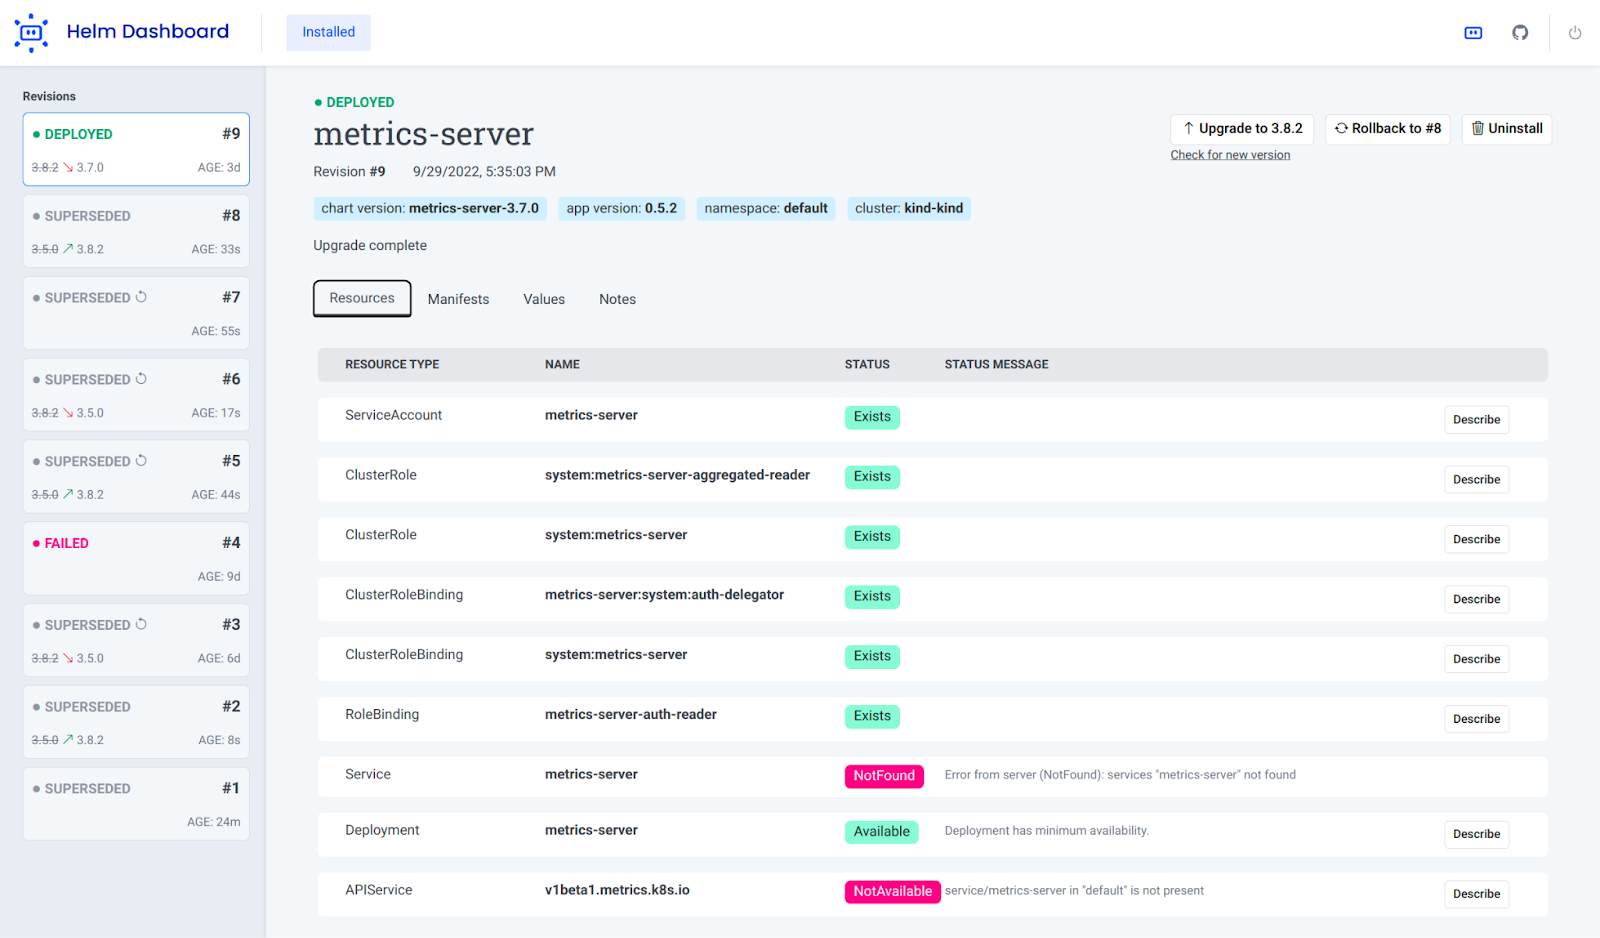
Upgrading and Rolling Again
Upgrading the Dashboard is simple with Helm:
helm improve my-dashboard kubernetes-charts/kubernetes-dashboardTo roll again to a earlier model:
helm rollback my-dashboard <revision>Substitute <revision> with the specified revision quantity, which might be discovered utilizing helm historical past my-dashboard.
Greatest Practices
- Use a devoted namespace: Deploy the Dashboard in a separate namespace for higher group and isolation.
- Configure RBAC: Implement granular RBAC to limit entry based mostly on roles and permissions.
- Commonly replace the chart: Keep up-to-date with safety patches and bug fixes by upgrading to the most recent chart model.
- Monitor useful resource utilization: Regulate the useful resource consumption of the Dashboard to stop efficiency points.
- Use a safe authentication technique: Keep away from utilizing the default insecure authentication technique in manufacturing environments.
Conclusion
Deploying the Kubernetes Dashboard with Helm simplifies the method considerably, providing a extra manageable and scalable answer in comparison with guide deployment. By leveraging Helm’s options, you may simply customise, improve, and handle the Dashboard, guaranteeing a safe and environment friendly strategy to work together along with your Kubernetes cluster. Bear in mind to prioritize safety by implementing strong authentication and authorization mechanisms, and repeatedly monitor the Dashboard’s useful resource utilization and well being. By following the perfect practices outlined on this article, you may successfully make the most of the Kubernetes Dashboard to streamline your Kubernetes administration duties.

Closure
Thus, we hope this text has supplied worthwhile insights into Deploying the Kubernetes Dashboard with Helm: A Complete Information. We respect your consideration to our article. See you in our subsequent article!