Mastering Course of Flowcharts In Excel: A Complete Information
Mastering Course of Flowcharts in Excel: A Complete Information
Associated Articles: Mastering Course of Flowcharts in Excel: A Complete Information
Introduction
With enthusiasm, let’s navigate by means of the intriguing matter associated to Mastering Course of Flowcharts in Excel: A Complete Information. Let’s weave fascinating info and provide recent views to the readers.
Desk of Content material
Mastering Course of Flowcharts in Excel: A Complete Information

Course of flowcharts are indispensable instruments for visualizing and analyzing workflows, from easy duties to complicated organizational processes. Microsoft Excel, regardless of not being a devoted flowcharting software program, presents surprisingly strong capabilities for creating efficient and visually interesting course of flowcharts. This text will information you thru the method, from primary shapes and connections to superior methods for creating professional-looking diagrams inside Excel.
Half 1: Understanding the Fundamentals of Course of Flowcharts
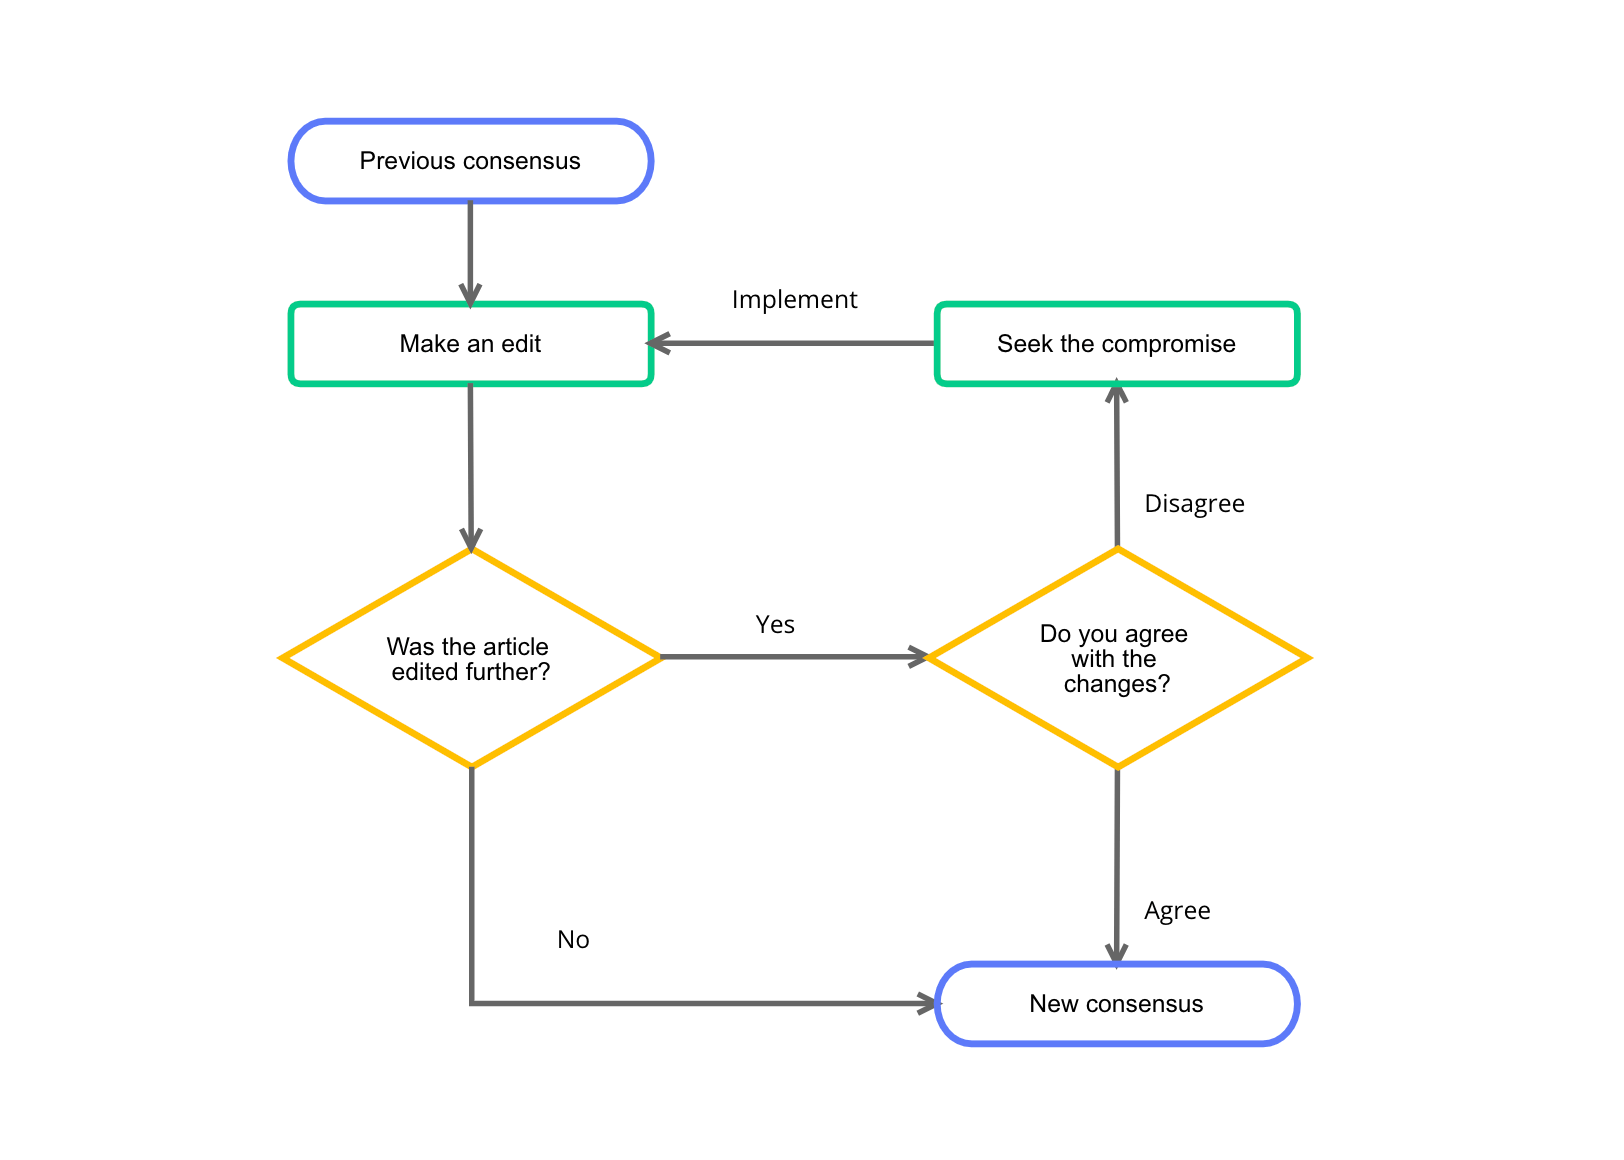
Earlier than diving into the Excel implementation, let’s solidify our understanding of flowcharting ideas. A course of flowchart makes use of standardized symbols to characterize completely different phases in a course of. These symbols convey actions, selections, knowledge inputs and outputs, and the stream of data. Widespread symbols embrace:
- Rectangle (Course of): Represents a step or motion within the course of.
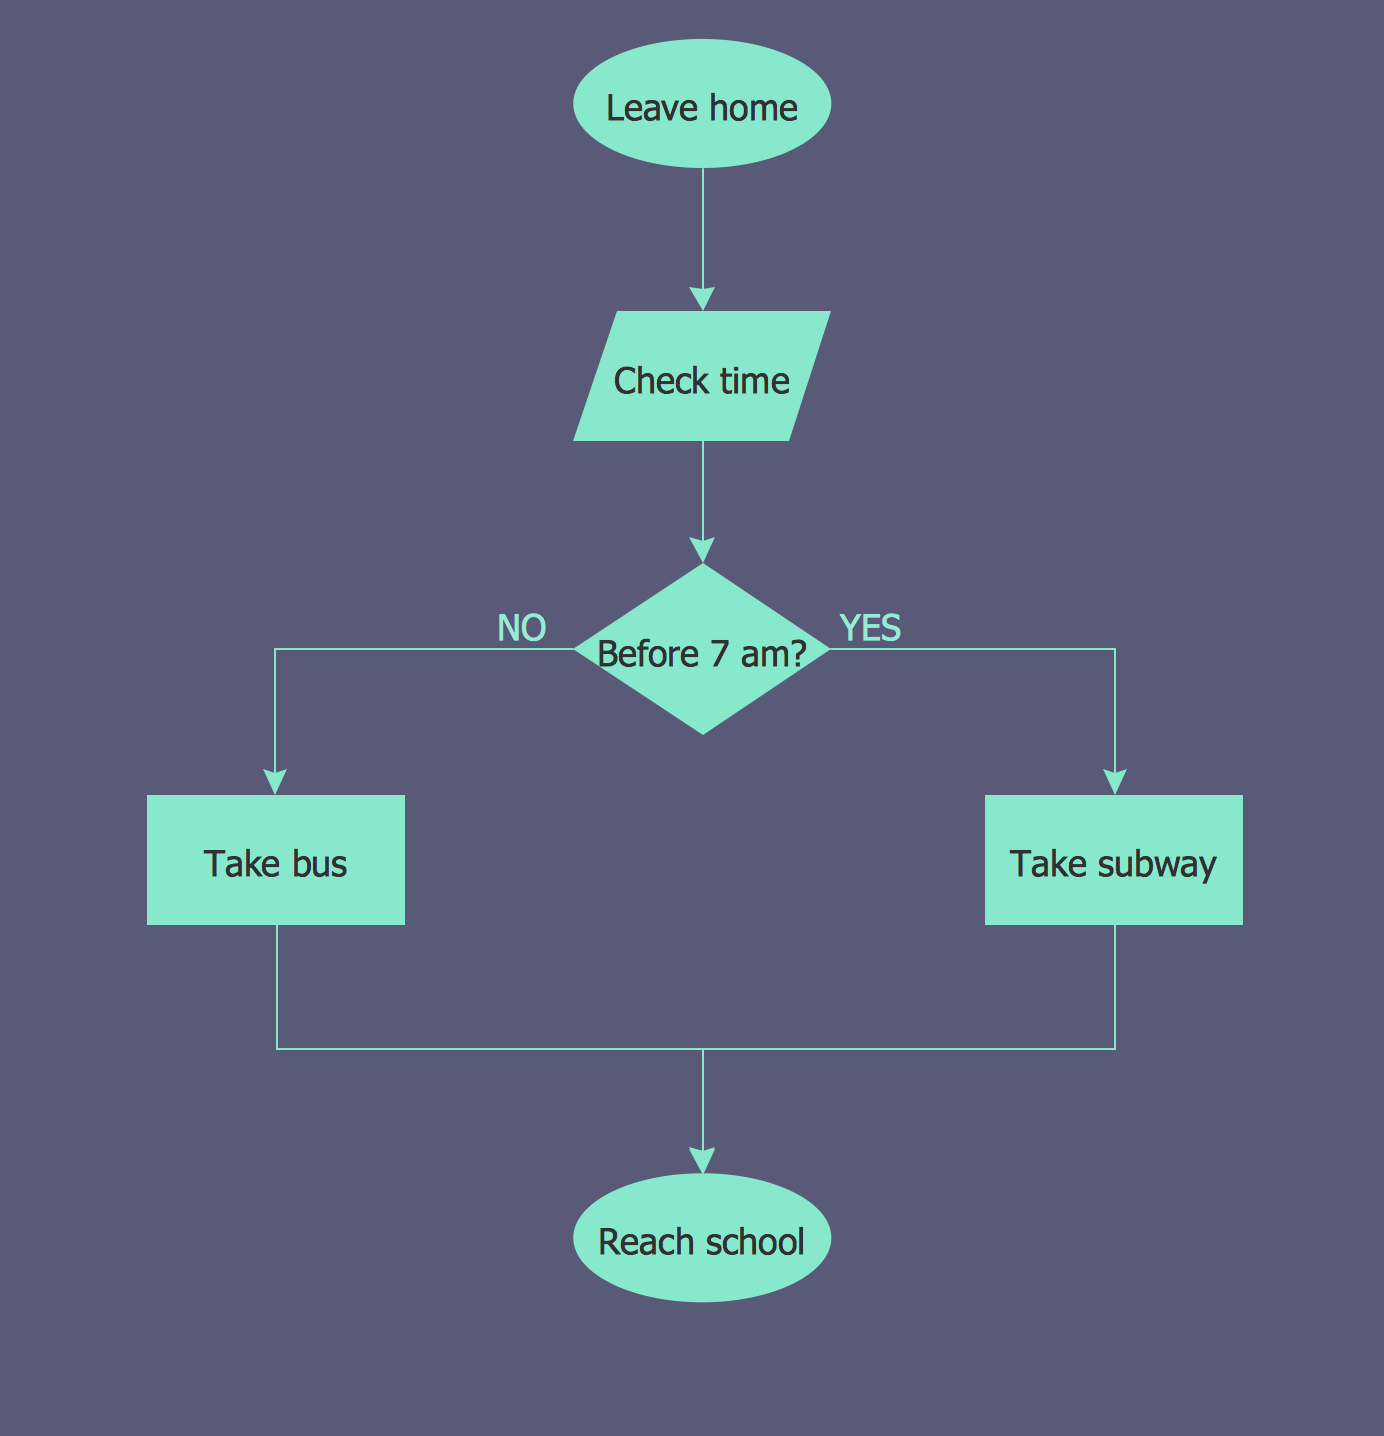
- Diamond (Choice): Signifies some extent the place a choice must be made, usually with "Sure/No" or comparable branching paths.
- Parallelogram (Enter/Output): Exhibits knowledge enter or output factors.
- Oval (Terminal): Represents the beginning and finish factors of the method.
- Arrow (Movement Line): Connects the symbols, indicating the path of the method stream.
Understanding these primary symbols is essential for creating a transparent and unambiguous flowchart. The readability of your flowchart hinges on the logical sequencing of those symbols and the precision of their labels. At all times try for simplicity and keep away from pointless complexity.
Half 2: Creating Primary Flowcharts in Excel
Excel’s drawing instruments present the muse for constructing your flowcharts. Here is a step-by-step information:
-
Insert Shapes: Navigate to the "Insert" tab and choose "Shapes." You will discover a wide range of shapes, together with these required for primary flowcharts (rectangles, diamonds, parallelograms, and ovals). Click on on the specified form and draw it on the worksheet.
-
Labeling Shapes: As soon as you have drawn a form, double-click it to enter textual content. Clearly label every form to explain its operate inside the course of. Use concise language and keep away from ambiguity.
-
Connecting Shapes: Use the "Strains" choice underneath "Shapes" to attach the shapes. Click on and drag to attract a line between the shapes, indicating the stream of the method. For readability, use arrows to indicate path. You may regulate the arrow color and style within the "Form Format" pane.
-
Formatting and Alignment: Excel presents intensive formatting choices. Use the "Form Format" pane to regulate the fill shade, border shade, font, and dimension of your shapes and contours. Constant formatting enhances readability. Align your shapes neatly to create a clear and arranged flowchart. Utilizing gridlines might be useful for alignment.
-
Including Textual content Packing containers: For extra complicated explanations or annotations, use textual content packing containers. Insert a textual content field from the "Insert" tab and place it close to the related form.
Instance: A Easy Order Processing Flowchart
Let’s illustrate with a easy order processing flowchart:
- Begin (Oval): Label: "Order Acquired"
- Course of (Rectangle): Label: "Confirm Order Particulars"
- Choice (Diamond): Label: "Order Full?" Sure/No branches.
- Course of (Rectangle): Label: "Course of Fee" (linked to "Sure" department)
- Course of (Rectangle): Label: "Notify Buyer of Lacking Data" (linked to "No" department)
- Course of (Rectangle): Label: "Ship Order" (linked to "Sure" department)
- Finish (Oval): Label: "Order Accomplished"
Half 3: Enhancing Your Flowcharts with Superior Strategies
Whereas primary shapes and contours suffice for easy processes, extra complicated situations profit from superior methods:
-
Swimlanes: For processes involving a number of departments or actors, use swimlanes. These are vertical or horizontal bands that visually separate completely different elements of the method, enhancing readability. You may create swimlanes utilizing rectangles and strategically positioning shapes inside them.
-
Subprocesses: For complicated steps, characterize them as a single form and hyperlink it to a separate detailed flowchart. This avoids overwhelming the primary flowchart with an excessive amount of element.
-
Information Movement: Clearly point out the stream of knowledge utilizing completely different line types or colours. This enhances understanding of knowledge inputs and outputs at every stage.
-
Customized Shapes: Whereas Excel presents primary shapes, you possibly can improve your flowcharts with customized shapes from on-line assets or create your individual utilizing drawing software program. You may then import these shapes into Excel.
-
SmartArt Graphics: Whereas not strictly flowcharting instruments, Excel’s SmartArt graphics can present various visible representations of processes, particularly for easier workflows.
-
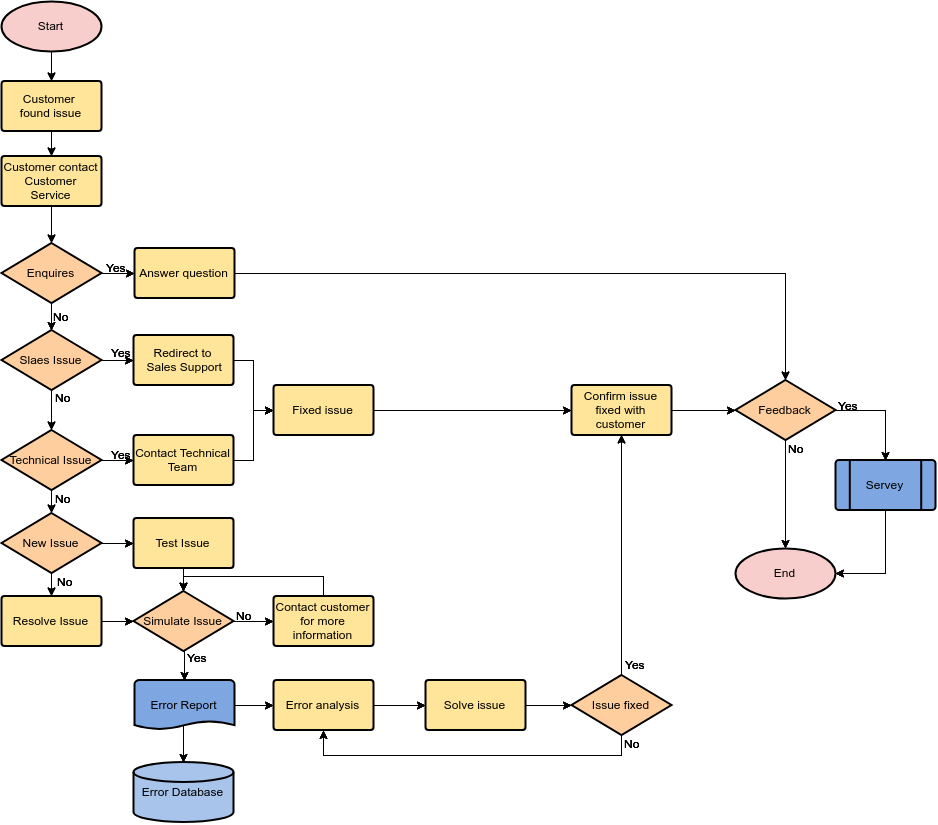
Conditional Logic: For complicated choice factors, use nested diamonds or choice tables to characterize a number of conditional branches successfully. This ensures correct illustration of all potential situations.
Half 4: Ideas for Creating Skilled-Trying Flowcharts
- Consistency: Preserve constant formatting all through the flowchart. Use the identical font, dimension, and shade scheme for all components.
- Readability: Use clear and concise labels. Keep away from jargon or technical phrases that the meant viewers won’t perceive.
- Scalability: Design the flowchart so it may be simply expanded or modified as the method evolves.
- White Area: Use ample white house to keep away from a cluttered look. Do not overcrowd the chart with too many shapes and contours.
- Annotations: Add annotations to supply additional explanations or clarifications the place mandatory.
- Model Management: Save a number of variations of your flowchart to trace adjustments and revert to earlier iterations if wanted.
Half 5: Options and Limitations
Whereas Excel is a viable choice, devoted flowcharting software program like Lucidchart, draw.io, or Microsoft Visio provide extra superior options and templates, making the creation of complicated flowcharts considerably simpler. Excel’s limitations embrace an absence of built-in flowchart stencils and probably cumbersome manipulation of shapes for intricate diagrams. For extremely complicated processes, these specialised instruments are beneficial.
Conclusion:
Creating course of flowcharts in Excel is achievable with understanding of flowcharting ideas and the utilization of Excel’s drawing instruments. By following the steps outlined on this article and using the superior methods, you possibly can create efficient and professional-looking flowcharts to visualise and analyze your workflows, no matter their complexity. Keep in mind to prioritize readability, consistency, and scalability in your design to make sure your flowchart serves its meant objective successfully. Selecting between Excel and devoted flowcharting software program depends upon the complexity of your course of and your particular wants.


.jpg)
Closure
Thus, we hope this text has supplied useful insights into Mastering Course of Flowcharts in Excel: A Complete Information. We thanks for taking the time to learn this text. See you in our subsequent article!